What Is a JIGSAW And What Is It Used For?
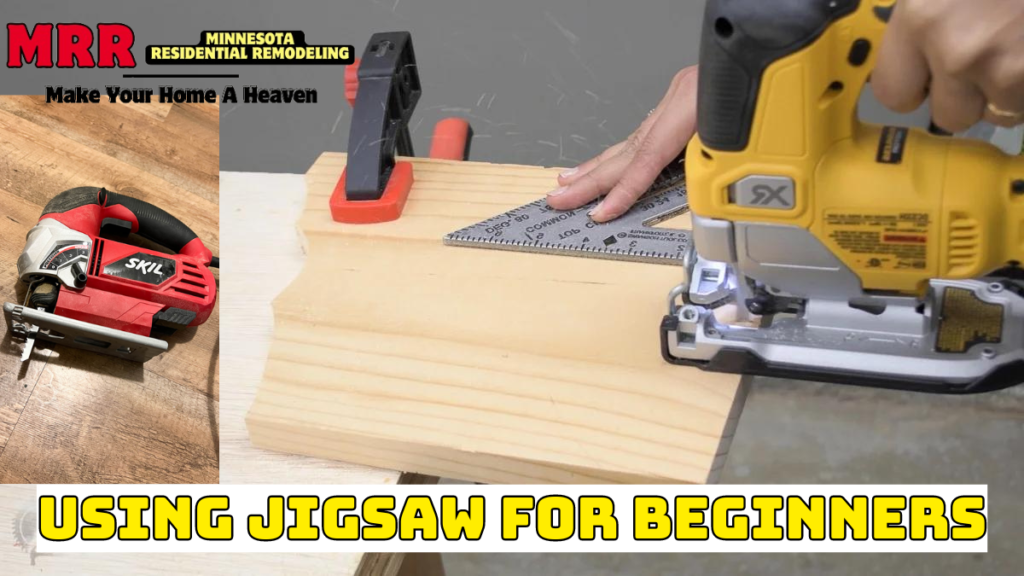
The jigsaw, a handheld power tool with a reciprocating blade, is a versatile friend for any DIY enthusiast. Perfect for making intricate cuts and curves in wood, plywood, and even metal (with the right blade), it can tackle projects from crafting furniture to intricate decorations. But for beginners, the jigsaw can seem intimidating. The jigsaw, sometimes referred to as a sword saw and sabre saw, is a portable model of scroll saw.
There are many applications for jigsaws. You can produce bevelled cuts, plunge cuts and straight cuts with a jigsaw (with practice).
Nevertheless, curved cuts such as circles, arches, and more elaborate patterns are where the jigsaw really pops. The jigsaw is comparable to the bandsaw and scroll saw due to its ability to cut sharp angles and curves.
This guide will equip you with the knowledge and confidence to use a jigsaw safely and effectively.
Safety First:
Jigsaws, like any power tool, demand respect. Before you dive in, ensure you have the proper safety gear. Safety glasses are essential to protect your eyes from sawdust and debris. Additionally, using a dust mask is recommended, especially when cutting materials that generate a lot of dust.
Here are some safety tips gleaned from user experiences on forums like [invalid URL removed]:
- Always unplug the jigsaw before changing blades or making adjustments.
- Keep your fingers away from the blade while the jigsaw is running.
- Use a clamp to secure your workpiece to a stable surface to prevent it from moving while cutting.
- Cut at a moderate pace and avoid forcing the jigsaw.
Jigsaw Parts
You must know all the different parts and what they do before you learn how to operate a jigsaw:
2 different jigsaw handle styles: bow handle (D handle) and barrel grip.
Jigsaws come in two main grip styles: the bow handle (also known as D-handle) and the barrel grip. While they both achieve the same function, they offer different user experiences. Here’s a breakdown to help you decide which might be better for you:
D-Handle:
- Pros:
- Familiarity: The D-handle design is the more traditional one, potentially feeling more comfortable for users accustomed to other tools.
- Power and Control: The D-handle’s higher placement allows for a more powerful grip and a feeling of greater control, especially for straight cuts [Bosch D Handle or Barrel Grip Jigsaw, FineWoodworking, https://www.finewoodworking.com/forum/which-jig-saw].
- Cons:
- Limited Maneuverability: The D-handle design can restrict wrist movement slightly, making tight curves a bit more challenging.
- Line of Sight: The D-handle position might obstruct your view of the cutting line for some users.
Barrel Grip:
- Pros:
- Precision Cuts: The lower profile of the barrel grip allows for more wrist articulation, offering greater control and maneuverability for intricate cuts and curves [YouTube, Barrel Grip VS D Handle Explained FINALLY !!, https://www.youtube.com/watch?v=6Jm-6Zx1Yis].
- Visibility: The barrel grip typically provides a clearer view of the cutting line.
- Cons:
- Less Leverage: The lower position of the hand might feel like it offers less leverage or pushing power compared to the D-handle, potentially impacting thicker materials.
- Unfamiliar Feel: Users accustomed to D-handle tools might find the barrel grip less intuitive initially.
Trigger
The trigger is a lever on the handle that controls the power to the blade. It’s a crucial safety feature and plays a key role in operating the jigsaw effectively.
Here’s a closer look at the function and some important points to remember about the jigsaw trigger:
Function:
- Pressing the trigger activates the motor, causing the blade to rotate.
- Most jigsaws incorporate a safety mechanism within the trigger design. This means you might need to depress a separate button or squeeze the handle in a specific way to fully engage the trigger and power the blade. This is a safety feature to prevent accidental starts.
- Releasing the trigger disconnects power to the blade, stopping it from rotating.
Safe Operation:
- Always unplug the jigsaw before changing blades or making adjustments. This is a general safety rule for power tools and applies to interacting with the trigger as well.
- Never keep your finger on the trigger while the jigsaw is not in use. This can lead to accidental activation and potential injury.
- Maintain a firm grip on the handle while using the trigger. This ensures better control over the jigsaw.
Trigger Features (on some models):
- Variable Speed: Some jigsaws have a variable speed trigger that allows you to adjust the cutting speed. This can be helpful for controlling cuts in different materials or for delicate work.
- Lock-on Switch: A few jigsaws might have a lock-on switch that allows you to keep the trigger depressed continuously without holding it down. This can be useful for extended cuts but use it with caution and be mindful of keeping control of the jigsaw.
Speed Control Dial
The speed control dial, a common feature on jigsaws, empowers you to fine-tune the cutting speed for optimal results in various materials. Here’s a breakdown of its function and how to use it effectively:
What Speed Control Dial Does:
The speed control dial, typically a rotary knob located near the handle or trigger, allows you to adjust the maximum speed of the jigsaw blade. Imagine it like the gas pedal in a car; it sets the upper limit, and you control the power within that range using the trigger.
Benefits of Using the Speed Control Dial:
- Material Specific Cutting: Different materials require different cutting speeds. For instance, a slower speed is ideal for harder materials like metal or thick wood to prevent burning or blade damage. Conversely, softer materials like plywood can be cut efficiently at higher speeds.
- Precision Control: The ability to adjust speed allows for more control during delicate cuts or when starting a curved cut. A slower speed provides greater precision and reduces the risk of chipping the material.
- Optimizing Blade Life: Using the correct speed for the material helps extend the life of your jigsaw blade by preventing overheating and unnecessary wear.
How to Use the Speed Control Dial:
- Consult Your Manual: Refer to your jigsaw’s user manual for specific recommendations on speed settings for different materials.
- Start Slow: It’s generally recommended to begin with a slower speed setting, especially when working with a new material or unfamiliar with the jigsaw. You can gradually increase the speed as needed and feel comfortable.
- Match Speed to Material and Cut: Here’s a general guideline:
- Slower Speeds: For harder materials like metal, thick wood, or delicate cuts.
- Higher Speeds: For softer materials like plywood or for faster cuts in suitable materials (refer to your manual for specifics).
- Test and Adjust: Make a test cut on a scrap piece of material to see how the speed feels. Refine the speed control dial setting as needed to achieve the desired results.
Orbital Action Switch
The orbital action switch on a jigsaw is a hidden gem that can significantly enhance your cutting experience. It allows you to control the blade’s movement for faster cutting or cleaner results, depending on your needs.
Orbital Action Settings:
Most jigsaws with orbital action will have a dial or lever with several settings, typically ranging from 0 (no orbital action) to 3 (highest level of orbital action). Here’s a general guide:
- 0 (Off): Use this for clean cuts in thin, delicate materials where chipping is a concern.
- 1-2 (Low): A good middle ground for balance between cutting speed and minimal chipping in moderately thick materials.
- 3 (High): Ideal for faster cutting in thick materials where a clean finish is less critical.
Footplate Or Shoe
The footplate, also sometimes referred to as the shoe, is the unsung hero of the jigsaw world. This flat plate at the front of the jigsaw plays a crucial role in guiding the blade and ensuring accurate, controlled cuts.
Function of the Footplate:
- Stability and Control: The footplate rests on the workpiece, providing a stable base for the jigsaw as you cut. This stability allows you to guide the jigsaw precisely along the cutting line.
- Cutting Depth Adjustment: Most jigsaws allow for adjusting the footplate’s angle relative to the blade. This adjusts the cutting depth – tilting the footplate down increases the cutting depth, and vice versa.
- Bevel Cuts: The footplate can often be swivelled to create angled cuts, also known as bevel cuts. This is useful for tasks like creating decorative edges or joining pieces of wood at an angle.
Using the Footplate:
- Ensure a Secure Fit: Before starting a cut, verify that the footplate is securely fastened to the jigsaw body. A loose footplate can impact cutting accuracy and control.
- Guiding the Cut: Hold the jigsaw firmly with one hand on the handle and the other hand on the top of the jigsaw, close to the blade. Use the footplate as a guide, gliding it smoothly along the cutting line.
- Depth Adjustment: Refer to your jigsaw’s manual for instructions on adjusting the footplate angle for desired cutting depths. Mark your cutting depth on the material beforehand for better precision.
- Bevel Cuts: Consult your manual for instructions on swiveling the footplate to make bevel cuts. Be sure to adjust the angle markings on the footplate to match your desired bevel angle.
Blade
The blade is the heart and soul of a jigsaw. This thin, reciprocating blade tackles various materials, from wood and plywood to metal and plastic, transforming your jigsaw into a versatile cutting tool.
Types of Jigsaw Blades:
Jigsaw blades come in a variety of configurations, each optimized for specific materials and cutting applications. Here are some key factors to consider when choosing a blade:
- Material: Different materials demand blades with specific features. For instance, blades designed for metal cutting will have more teeth and a harder material composition compared to blades for wood.
- Teeth Per Inch (TPI): The TPI refers to the number of teeth per inch on the blade. A higher TPI blade (more teeth) cuts slower but delivers a finer finish, ideal for delicate cuts in thin materials. Conversely, a lower TPI blade (fewer teeth) cuts faster but leaves a rougher edge, suitable for thicker materials or quick cuts where a clean finish is less critical.
- Tooth Design: The shape and configuration of the teeth also play a role. Regular wave teeth are a good all-purpose option for wood. Bi-metal blades have a combination of high-speed steel and another metal, making them more durable for tougher materials like metal or thicker wood.
Common Jigsaw Blade Types:
- Wood Blades: These blades typically have a TPI ranging from 6 to 10 and come in various configurations for different wood types (hardwood, softwood, plywood).
- Metal Blades: Metal cutting blades have a higher TPI (often 18 or more) and are made from high-speed steel or bi-metal for durability.
- Plastic Blades: For plastic materials, blades with a lower TPI (around 6-8) and a slightly wider gullet (space between the teeth) are recommended to prevent melting of the plastic.
Getting Started – How to Use Jigsaw:
- Choosing Your Jigsaw: Jigsaws come in various power ratings and with different features. For basic tasks, a corded jigsaw with around 5 amps of power is sufficient. Consider variable speed options for more control over different materials.
- The Right Blade: Different blades are designed for various materials. High-tooth-count blades are ideal for clean cuts in wood, while lower tooth-count blades are better for faster cuts in thicker materials.
- Preparing Your Workpiece: Ensure your cutting line is clearly marked. Clamp your workpiece down to a sturdy surface to prevent it from moving during cutting.
Making the Cut:
- Blade Insertion and Adjustment: Refer to your jigsaw’s manual for specific blade installation instructions. Most jigsaws have a lever or button that allows for easy blade changes.
- Positioning: Hold the jigsaw firmly with a good grip on the handle and keep your body balanced. Position the jigsaw so the blade is just behind the cutting line on your workpiece.
- Starting the Cut: Most jigsaws have a safety trigger that needs to be depressed before the blade will engage. It’s recommended to let the blade reach full speed before initiating the cut [invalid URL removed].
- Cutting Curves and Straight Lines: For straight cuts, use the jigsaw’s base plate as a guide. For curves, pivot the jigsaw slightly and follow the line slowly. Avoid forcing the jigsaw; let the blade do the work.
How to Cut Straight And Curves with a Jigsaw?
Conquering both straight and curved cuts with your jigsaw is a valuable skill for any DIYer. Here’s a breakdown of effective techniques for mastering these cuts:
Straight Cuts:
- Preparation is Key:
- Clamp It Down: Secure your workpiece firmly to a stable surface using clamps. This prevents the material from moving while you cut, ensuring a straight line.
- Mark Your Line: Clearly mark the cutting line on your workpiece. A straightedge and pencil are your best friends here.
- Setting Up the Jigsaw:
- The Right Blade: Choose a jigsaw blade with a lower TPI (teeth per inch) for faster, straight cuts. Refer to the blade section of this guide for choosing the ideal blade for your material.
- Footplate Alignment: Ensure the jigsaw’s footplate is flush against the workpiece and perpendicular to the cutting line.
- Making the Cut:
- Start Outside the Line: Begin cutting slightly outside the marked line (around 1/16th of an inch). This allows room for error and can be sanded smooth later.
- Slow and Steady: Maintain a moderate cutting speed and avoid forcing the jigsaw. Let the blade do the work.
- Follow the Line: Use the edge of the footplate as a guide to follow the marked cutting line as closely as possible.
Tips for Flawless Straight Cuts:
- Mark a Double Line: Draw two parallel lines close together to create a cutting channel. Guide the jigsaw blade along the center of these lines for extra accuracy.
- Use a Jigsaw Guide: Some jigsaws come with attachable guides or fences that help maintain a perfectly straight line while cutting.
- Practice Makes Perfect: Before tackling your project, make some practice cuts on scrap material to get comfortable using the jigsaw and refine your technique.
Curved Cuts:
- Preparation:
- Clamp and Mark: As with straight cuts, secure your workpiece and clearly mark the intended curve on the material.
- Jigsaw Setup:
- Sharp Blade is Key: Use a jigsaw blade with a higher TPI (more teeth) for cleaner cuts on curves. Refer to the blade section for choosing the right blade.
- Cutting the Curve:
- Pivot, Don’t Force: Unlike straight cuts, you won’t be dragging the footplate along the line. Instead, pivot the jigsaw slightly, following the curve with the blade. Avoid forcing the jigsaw; let it follow the curve naturally.
- Take Your Time: Curved cuts require more focus and control. Maintain a moderate speed and concentrate on following the marked line.
- Start Slow and Adjust: Begin with smaller, incremental cuts, especially on tight curves. You can always go back and refine the cut for a smoother finish.
Tips for Symmetric Curved Cuts:
- Pilot Holes for Tight Curves: For intricate curves or interior cuts, drill a pilot hole first. This allows you to insert the jigsaw blade within the material and initiate the cut without damaging the edge.
- Follow the Inside Line: To ensure your curve stays on track, aim to cut on the inside of the marked line. You can then sand the edge smooth to achieve the final desired shape.
- Practice on Curves: Just like with straight cuts, practice cutting curves on scrap material before moving on to your project. This helps you get comfortable with the technique and build confidence.
Tips from the Makers:
- User experience on YouTube: https://www.youtube.com/ recommends sorting jigsaw puzzle pieces by color first to make assembling them easier. This might seem analogous, but you can also sort your approach to jigsawing a project by identifying the straight cuts and planning your curved cuts for later.
- For intricate cuts, especially when starting a hole for an interior cut, drill a pilot hole first. This will prevent the blade from potentially chipping the material when entering the cut.
Last Words:
With a little practice and these helpful steps, you’ll be wielding the jigsaw with confidence in no time. Remember, safety is paramount, so take your time, use the right tools, and enjoy the satisfaction of creating with this versatile power tool.


