


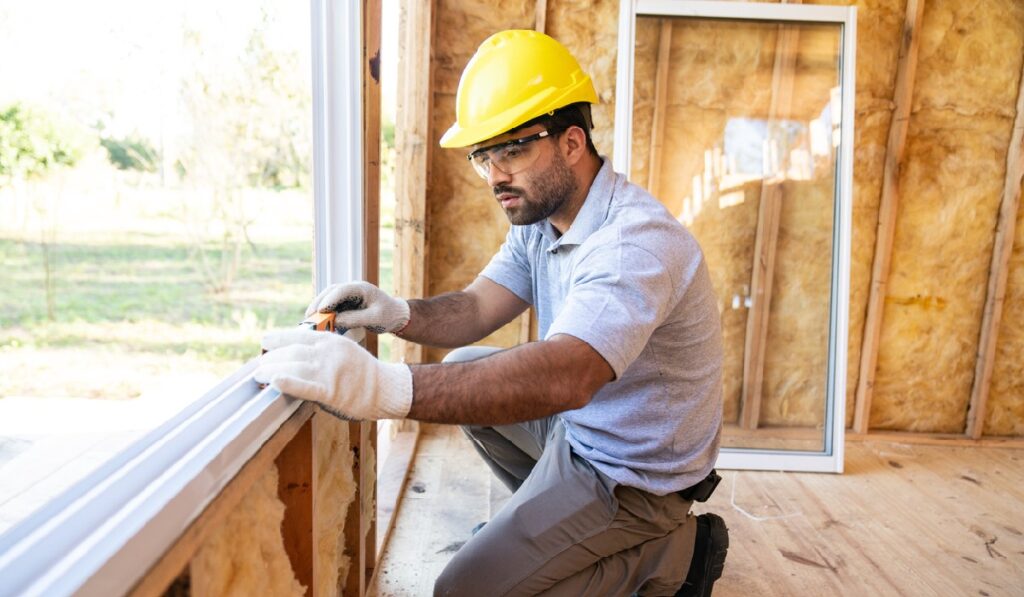
Do you need to put in a new window? We’ll demonstrate how.
Learning how to frame a window involves several processes, which this tutorial will take you through step-by-step. First of all, it’s crucial to understand that cutting an aperture in the interior drywall that is significantly bigger than the window opening is typically the simplest way to frame a window in a new position. It’s difficult to place framework within a wall, especially the header, so you’ll need to mend the walls afterwards.
Additionally, it’s typically simplest to cut the studs and construct the frame without removing the outside sheathing and siding. This keeps the siding from needing to be replaced. In case you decide to replace it nonetheless, you have the option to create a sizable aperture on the outside concurrently with the inner hole. You will need to trim back the siding to make room for any brick molding or flange that the window may have.
If your wall is made of brick, have a professional mason to carve an aperture for you. Always take your time while framing to create a framework that will provide the drywall a smooth surface. Fit adjacent parts such that they are flush with one another.
You will need to design the frame and remove internal drywall, so plan on working on this project for the entire day. This project is not as difficult as it seems. Before attempting to frame, we advise do-it-yourselfers who want to learn how to frame a window opening to have some experience measuring, marking, and cutting.
Things You’ll Need
Equipment / Tools
- Combination square
- Drill with screwdriver bit
- Flat pry bar
- Framing square
- Hammer
- Handsaw
- Level
- Measuring tape
- Nail set
- Reciprocating saw
- Stapler
- Stud finder
Materials
- 16d and 10d nails or 2- and 3-inch deck or wood screws
- 2x4s or 2x6s for framing
- Plywood
- Shims
- Staples
Instructions in 17 steps
Framing a Window Opening Yourself
1. Set Up Area and Check Studs
To stop dust from getting in, cover the floor with drop cloths and seal the openings before you start. Put a fan in a window close by and face outward.
Next, check your studs. In this setup, a 2×2 or 2×4 cleat is fastened to the stud on one side to serve as a nailing surface for repairing the drywall once the window is placed, and an existing wall stud is utilized as the king stud on the other. (This is stronger and easier than having to cut the drywall halfway through a stud and then use the nailing surface that is just half the width of the stud.)
2. Put the Studs in
A minimum of one new king stud that is the same length as the others is required. Slice off two cripple studs so that the sill sits on them. (A jack stud will be attached above, enclosing the sill between it and the cripple stud.) Drive a fastener in an alternate pattern, about every 12 inches.
3. Installing Studs
Wedging the king stud between the top and bottom plates will allow you to install a king-and-cripple stud combination. When building a cavity, insert angled 10-d nails or 2-inch screws halfway under the drywall and press the king-and-cripple stud in place. (Starting with the studs offset by about ¼ inch is a good idea, as fastening will likely shift them over slightly.)
4. Placement of Mark Studs
Put a mark on the bottom plate (sole) designating the location of the jack and king studs. The rough opening’s width is determined by the separation of the jack studs.
5. For the Header, Mark
Mark the bottom of the header by placing a level on the jack stud and moving it across the studs. Mark the location of the header’s top by taking an upward measurement. Draw cutlines that are around ⅛ inch above the measured length. Use shims to close any gaps that may exist. Step 7: Cut the bottoms approximately ⅛ inch below the measurement.
6. Middle Studs, Mark
Additionally, mark the central studs so that the bottom may be trimmed. For a single bottom plate, they should be marked for the required rough opening dimension + 1½ inches, and for a double bottom plate, for 3 inches.
7. Final Marking
To guarantee a square cut, finish marking by running a square over each stud. Before you begin cutting, if you haven’t already, construct a temporary wall support.
8. Segmented Lines
A circular saw’s blade should be set to its maximum depth and aligned with the saw’s baseplate. To make sure the blade is cutting square, cut a scrap piece. Use the circular saw to cut the lines while protecting your ears and eyes.
9. Final Cuts
Use a reciprocating saw or handsaw to finish the cuts.
10. Construct the Header
Cut two pieces of 2×6 or 2×8 to the width of the opening plus 3 inches to construct the header. To make spacers, cut ½-inch pieces of plywood. Sort the direction in which the 2xs “crown” (bend upward in the middle) by laying them on top of one another. Note the direction in which their crowns point. Every eight or ten inches, place a spacer, place the second 2x on top, then screw in two or three 3-inch screws.
11. Affix the header
With the crown facing up, place the header on the jack studs. It might need to be hammered into place. Use 3-inch screws or 16d nails to secure the header.
12. Establish the Sill
For the sill, cut one or two sections to length. Install the sill with screws or nails. If you’re using two pieces, attach the first one to the top of the cripple studs before adding the second.
13. Look up Square
Examine the square’s entrance. It’s okay if the aperture is an inch or two out of square as long as it’s ½ inch higher and broader than the window. Place the window in the opening and do one last check to make sure it is square.
14. Locator Holes for Bores
Once you are positive that the opening is right, drill locator holes to the outside at each corner using a drill bit that is long—roughly ½ inch.
15. Sliced Wall
If you have plaster walls and repairing the walls may be challenging, you can decide to just slide the new frame in. Cut a piece of the completed wall to fit the aperture precisely.
16. Stud Cutting
Taking into consideration the header and sill widths, cut through the studs above and below using a reciprocating saw.
17. Put Header and Sill in Slip
To hold the new header up, put a jack stud into each end and slip it into the aperture. Additionally, slip in the sill. Fasten the frame components together with angle-drive screws.
Source:
https://www.bhg.com/home-improvement/windows/window-repair/how-to-frame-a-window-opening/
-

5 Questions to Consider Before Installing Rooftop Solar
As energy costs rise and environmental concerns grow, many homeowners are considering rooftop solar panels as a sustainable and cost-effective
-
How Much Does A Handyman Charge To Paint A Room In Minnesota?
Giving your Minnesota home a fresh coat of paint can breathe new life into a space. But if you’re not
-

How Much Does a Handyman Charge Per Hour in Minnesota (Updated for 2024)
Keeping your Minnesota home in tip-top shape often requires a toolbox full of skills and sometimes, more hands than you
-
Make a Pea Gravel Patio Yourself -What Tools You May Need?
Pea gravel patios offer a charming and budget-friendly way to create an inviting outdoor space. They are perfect for patios,
-

Pea Gravel Patios: A Budget-Friendly But Practical Choice?
Pea gravel patios have become a popular choice for homeowners looking for an attractive and affordable outdoor space. Made from
-

The Curious Case of the Skibidi Toilet Song: A Viral Enigma
The internet is a breeding ground for bizarre trends, and the “Skibidi Toilet Song” is a prime example. While its